


Listen
UPDATE 2: 3/14/2020, 5:30 P.M. The free version of Zoom is back up and in order.
UPDATE: (3/13/2020, 12:31 P.M.) We recommended Zoom below as a free service, but in the past 12 hours, we’ve become aware that their free services are temporarily suspended because they are overwhelmed with teachers and districts using their services. They are now charging a fee.
Also, many education companies are offering their services for free or very low prices while schools are closed. Here’s a list we found on Facebook with the details: Education Companies List
ORIGINAL ARTICLE
With many districts making the choice quickly whether or not to close due to illness, many teachers are being faced with a new challenge: teaching online.
The technology for this sort of virtual classroom has been around for quite a while. In fact, children in China have been taking classes with English-speaking teachers located in the U.S. online for years now. Public and charter schools have also paved the way for online learning, and most universities and colleges have been using some form of “distance learning” for a couple of decades.
The concept isn’t new for many, but the execution of the concept from the position of educator may be something not all teachers are completely comfortable with initially.
We asked colleagues and fellow writers with experience what the best advice was for moving the learning experience from the classroom “irl” (in real life) to the virtual classroom, and here’s what we found.
Practice Before Class
If you think your district has the slightest chance of being quarantined and wanting to use online classroom time to replace face-to-face class time, you need to start preparing now.
Gather a group of fellow teachers, or even your spouse or friends outside of the school setting and start practicing with software that can be used to teach virtually. If your district is already using a learning management system (like Canvas LMS), you may already have a program available to practice with.
If not, try Zoom, Google Classrooms or Moodle. Here’s a list of learning management systems along with their uses and prices (there are several that can be used for free).
Whatever mode you plan to use to deliver your lessons, be sure you practice with a group of colleagues or friends before you actually have to use it. Call each other and try out all the features available so you’ll know how things work when teaching virtually.
If you have kids of your own, or family and friends with children, try reading them a story using a virtual platform. See what things might be an issue for you with a virtual classroom full of students, and start working to solve those problems before they actually occur.
Turn Off Mics and Video Feeds
It’s tempting to have a free-for-all class party online before starting class, but it’s best to introduce students to a virtual classroom much like you would begin classes in a traditional school. Introduce rules and norms, THEN give students a tour of the buttons and features they can use in the classroom.
It’s usually best to turn off microphones and video feeds initially, and if possible, you can turn off chat features as well. You can greet each student verbally and ask how they’ve been and they can respond to you (and hopefully only you) in the chat box.
With many learning systems, you can turn off the video feed so that students aren’t seeing each other and you’ll still be able to see the students. In addition, you can turn off all the video feeds and share only audio and a screen. Some programs use blank screens, some use screens that can only be written on and manipulated by the presenter, and some have functions that allow you to share the ability to write.
Establish Behavior and Participation Norms
Just as you would with any classroom, begin your time together by letting students know what you expect of them behaviorally in your online classroom. For many the novelty of attending school virtually from home may be the most exciting thing they’ve experienced in a while.
They may be in their pajamas, with three cans of soda open around them. They might have a dog or cat or younger sibling hanging out with them. While it may be fun to meet everyone’s extended family and fur babies, the best rule of thumb is to require learning first. Save some time at the end of class to meet everyone’s pets, baby brothers and sisters, and great-grandmas.
Along those lines, families can be either very helpful or very distracting in online learning.
On one hand, if your student is struggling with paying attention and participating, you may need to get someone physically present with the student to address your concerns. It’s always a good idea to have contact information for each parent available in case you need to get a message to them asking for help.
One unique distraction online teachers face frequently is family nudity.
People forget that their child is online and talking to classmates and their teacher. Family members (and sometimes, even students) want to be comfortable at home, and every family has their own definition of comfort.
If you are able to communicate with families what your expectations will be beforehand, be sure to include a “dress code”. Pajama pants are probably fine, but ask students to wear t-shirts or uniform shirts. Most importantly, remind parents to either turn the computer and camera so that it’s facing a blank wall, or at least put it in a “no traffic” area so that no one makes a surprise appearance in your virtual classroom.
Finally, along the same lines, just mention that students need to let you know if they go to the restroom and aren’t present in class anymore. They don’t need to bring the class along. It may sound silly, but kids (especially little ones) just don’t think about that, and if your microphones and videos aren’t turned off (or you turn them on to get responses to questions), you could have an unwelcome surprise!
Things That Can Really Improve Your Lessons
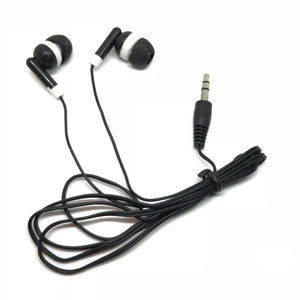
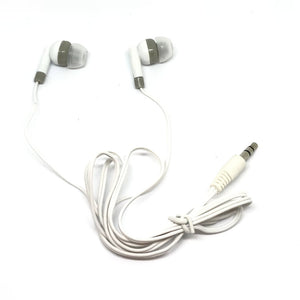
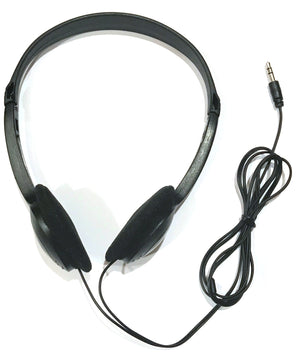
Headsets With a Good Microphone
Gaming headsets are the best, but even if all you have are earbuds with a microphone, it’s likely better than using your computer’s microphone. Record yourself to see if you are able to be heard properly.
Remember also that when you use earbuds, the microphone will brush against hair or clothing and make annoying noises. Try to avoid moving around too much if that’s the type of microphone you use.
If you’re going to be expected to teach online all day, purchasing a gaming headset is much more comfortable, typically lasts longer, and is able to produce a much higher quality sound than earbuds.
Also - pro tip: going from standing while teaching to teaching while sitting at a computer may be challenging. If you’re teaching from a laptop or wireless computer, think about transitioning at some point from sitting to standing, or vice versa. It makes a huge difference when you are able to move around a bit. The computer chair can be sort of “stifling” (or so comfy that you never want to go back to the classroom - yikes!)
Plugging into the Internet Instead of Using WiFi for Class
If at all possible, it’s best to be plugged into the internet rather than accessing WiFi. WiFi tends to be spotty when multiple users are online, when the jobs you’re asking it to do are big ones with lots of information involved, and sometimes it seems it has trouble when the wind blows the wrong direction.
For a more dependable connection, plugging straight into the source is a good idea. It’s more likely to keep students from missing half of your lesson due to glitches on your end, at least.
Having Interactive Lessons Already Created
As soon as you know you’re going to need to teach online, start converting lessons to slides either via Powerpoint, Google Docs, or some other compatible slide-show-type of lesson.
When making slides you’ll use to lecture with, don’t include every detail of your planned discussion. Only include the highlights or main ideas.
Make as many slides as you can interactive, so you can ask students to either share the pen and circle or draw answers (writing with a mouse is pretty challenging, but if students have touch screens on their devices it might be easier for them to write).
Another way to make class more interactive is to integrate all those technology games and tools you already may be using in your face-to-face classroom. Build in learning games with Kahoot or Prodigy. If your students are younger, you can imbed the GoNoodle link for some of their movement and review games and play together. You could even build in time for them to play (meaning review) on their individual accounts on Study Island, Education.com, or whatever gamifying app or sites your district uses.
Make lessons as fun and interactive as you can, because you never know what you’re competing against for their attention at home
Wait Time
Wait time is a completely different concept in online classes. While in the face-to-face classroom, you ask a question and wait patiently for the student to answer, but in an online setting, younger kids or those with little typing practice may be typing out their responses at the speed of a three-legged turtle during hibernation. You can’t always ask a question and just wait for a response.
When you assign a student a question or problem to work on, then ask them to send the response to you in the chat box, you have to keep going in order to keep the attention of all your other students.
It’s easiest if you are able to give each student a problem to work on, then wait for the first answers to start coming in. Once you start seeing answers, stop whatever you’re doing to acknowledge a correct answer or reteach if the answer is incorrect.
If you’ve got students who are taking a long time, keep teaching and come back to their answers once they’ve gotten them in.
Use the chat box to type in questions and who is assigned to each one, to share vocabulary words, and to keep a record of what you’ve already said.
Whenever possible, make the video and group chat of each lesson available for those who were not able to attend, or for your students to review what they’ve learned.
Mandatory Note Taking in a Shared Drive or Document
It’s very important to be able to monitor your students in some way as they are learning. Because you can’t see or hear your students participate in the online classroom the same way you would a face-to-face classroom, you need to be able to “drop in” and watch them work unannounced to be sure they’re understanding the lesson.
Note taking in a shared drive or document that the student is able to access and use at the same time you are viewing it is one way to monitor their participation.
You can have them take notes, fill in a study guide, or complete a graphic organizer as you are teaching. You can display your own copy, projecting it onto everyone’s screens so you are all working together. Pop in on their documents randomly as you teach just to be sure they’re all actively listening, especially those students who tend to let their minds wander.
Make the Best of It
Having to learn to teach online isn’t always ideal. Although it can be challenging, it can also be a fun change (especially if you’re wearing pajama pants too - pajama pants can make just about anything tolerable).
Stay well!
Thanks for sharing, it will be helpful.
if anyone wants an LMS for institution you can checkout this blog
https://www.cronj.com/blog/online-learning-management-system-for-schools-and-colleges/